Halloween Oreo Treats
I always like to plan a little ahead for the Holidays. These Halloween Oreo treats are an easy way to get into the spooky mood without much effort. No baking, just dip, decorate, and let them set. I’ve made these and other Halloween dipped Oreos for a few years now, and they always turn out fun. Whether you’re doing DIY Halloween cookies with kids or just want some quick Halloween Oreo cookies for a party, these are a great go-to. A bit of Oreo decoration and some sprinkles go a long way.

Why you’ll love this recipe♡
It’s quick and easy. No oven, no fuss – just melt, dip, and decorate.
It looks great on any Halloween table. The bright colors and fun sprinkles make them stand out.
It’s kid-friendly and fun to make together. Great for little hands (with a little supervision).

Ingredients you’ll need for this recipe

Step by Step Guide
1. Line a baking sheet with parchment paper or a silicone mat.Sort the Halloween sprinkles into small bowls for easy decorating access.
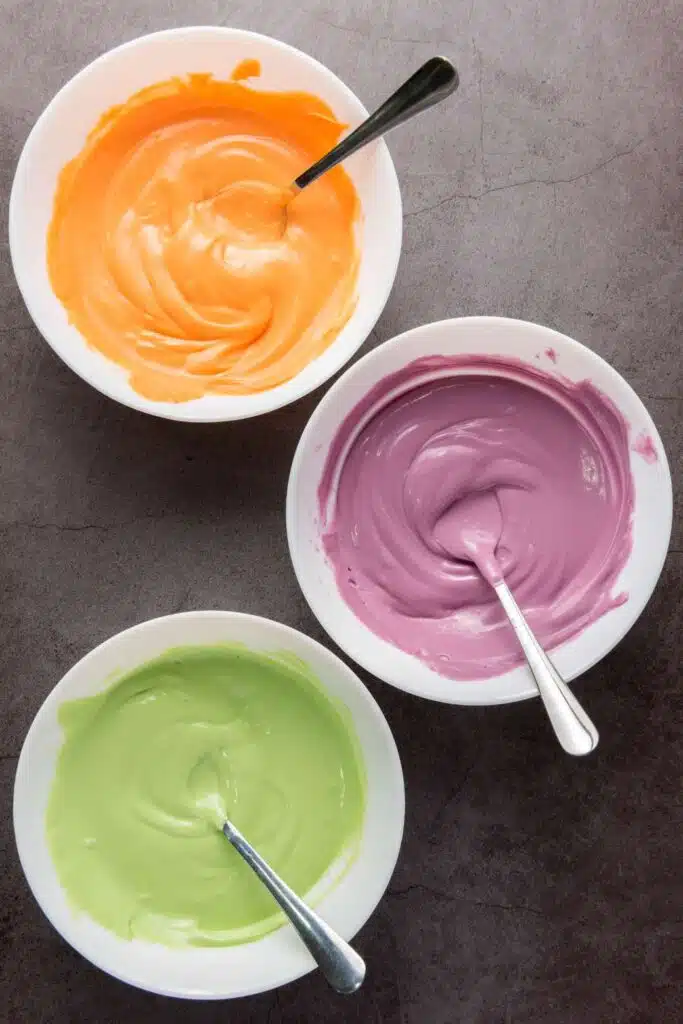
2. Place the purple, green, and orange candy melts into three separate microwave-safe bowls.
3. Heat each bowl individually in 30-second bursts, stirring well after each interval until the candy is completely melted and smooth.
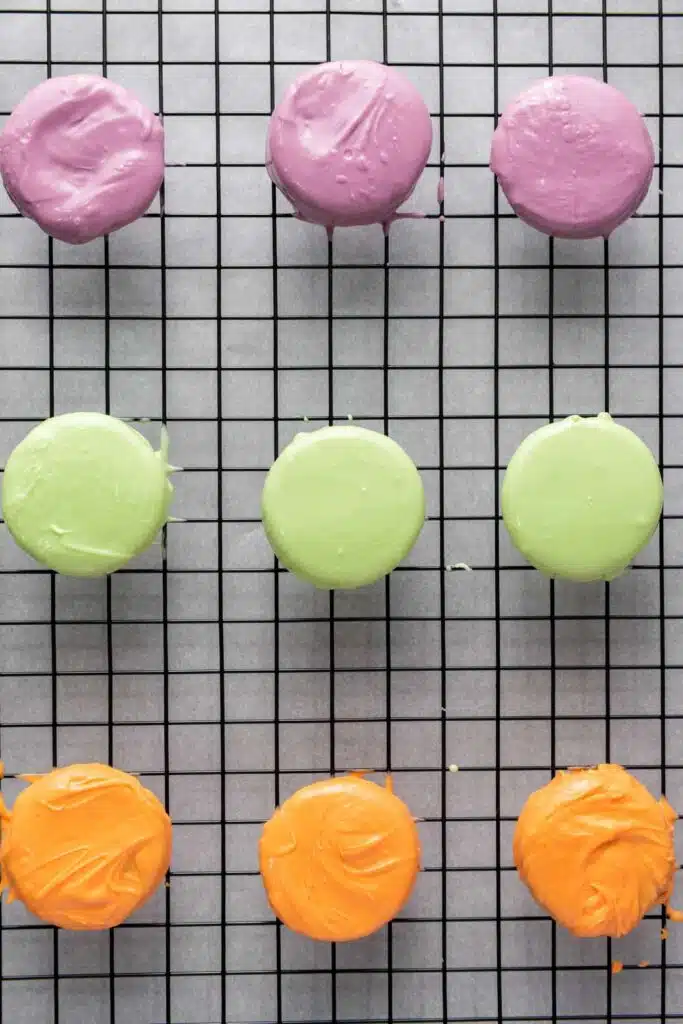
4. Using a fork or dipping tool, fully dip each Oreo into the melted candy, allowing any excess to drip off.
5. Transfer the coated cookies onto the prepared baking sheet. Dip 4 Oreos in each color – purple, green, and orange – for a vibrant mix.
6. While the candy coating is still soft, generously sprinkle Halloween-themed decorations over each Oreo.
7. Feel free to mix and match sprinkles for a festive, unique look on every cookie.
WANT TO SAVE THIS FOR LATER?
8. Let the Oreos sit at room temperature until the candy hardens completely, which usually takes 30 minutes to an hour.To speed this up, place the baking sheet in the refrigerator for about 15 minutes.
9. Once the coating is set, arrange the Halloween Oreos on a themed platter or store them in an airtight container until ready to enjoy.

Recipe FAQ
Q: Can I use regular chocolate instead of candy melts?
A: Yes, you can use white chocolate and color it with oil-based food coloring, but candy melts hold color and shape better for decorating.
Q: How long do Halloween Oreo treats stay fresh?
A: They stay fresh for up to one week in an airtight container at room temperature.
Q: Can I make these ahead of time?
A: Absolutely. They’re great for making 1–2 days in advance.
Q: What kind of Oreos work best?
A: Regular Oreos work great, but you can also use flavored or double-stuffed if you like.
Q: My candy melts are too thick. What can I do?
A: Add a tiny bit of vegetable oil or coconut oil to thin them out.

Q: Can I freeze Halloween dipped Oreos?
A: You can, but the candy coating may develop condensation when thawing, which can affect the texture.
Q: What kind of sprinkles should I use?
A: Any Halloween-themed sprinkles will work: bats, ghosts, pumpkins, eyes, etc. Mix and match for fun.
Q: How do I melt candy melts without burning them?
A: Microwave in short bursts of 30 seconds and stir in between. Don’t overheat.
Q: Do I need a candy thermometer?
A: No, it’s not needed for this recipe.
Q: Can I use gel food coloring in melted chocolate?
A: No, gel or water-based coloring will make the chocolate seize. Use oil-based color if needed.
Q: Are these treats safe for school parties?
A: Yes, as long as there are no allergy restrictions. Always check if nuts or dairy are a concern.

Halloween Oreo Treats
Ingredients
- 12 Oreo Cookies
- 1/4 cup Purple candy melts
- 1/4 cup Orange candy melts
- 1/4 cup Green candy melts
- Halloween Sprinkles (e.g., bats, pumpkins, ghosts, and other spooky shapes)
Instructions
- Line a baking sheet with parchment paper or a silicone mat.Sort the Halloween sprinkles into small bowls for easy decorating access.
- Place the purple, green, and orange candy melts into three separate microwave-safe bowls.
- Heat each bowl individually in 30-second bursts, stirring well after each interval until the candy is completely melted and smooth.
- Using a fork or dipping tool, fully dip each Oreo into the melted candy, allowing any excess to drip off.
- Transfer the coated cookies onto the prepared baking sheet. Dip 4 Oreos in each color – purple, green, and orange – for a vibrant mix.
- While the candy coating is still soft, generously sprinkle Halloween-themed decorations over each Oreo.
- Feel free to mix and match sprinkles for a festive, unique look on every cookie.
- Let the Oreos sit at room temperature until the candy hardens completely, which usually takes 30 minutes to an hour.To speed this up, place the baking sheet in the refrigerator for about 15 minutes.
- Once the coating is set, arrange the Halloween Oreos on a themed platter or store them in an airtight container until ready to enjoy.


