Easter Chocolate Bars
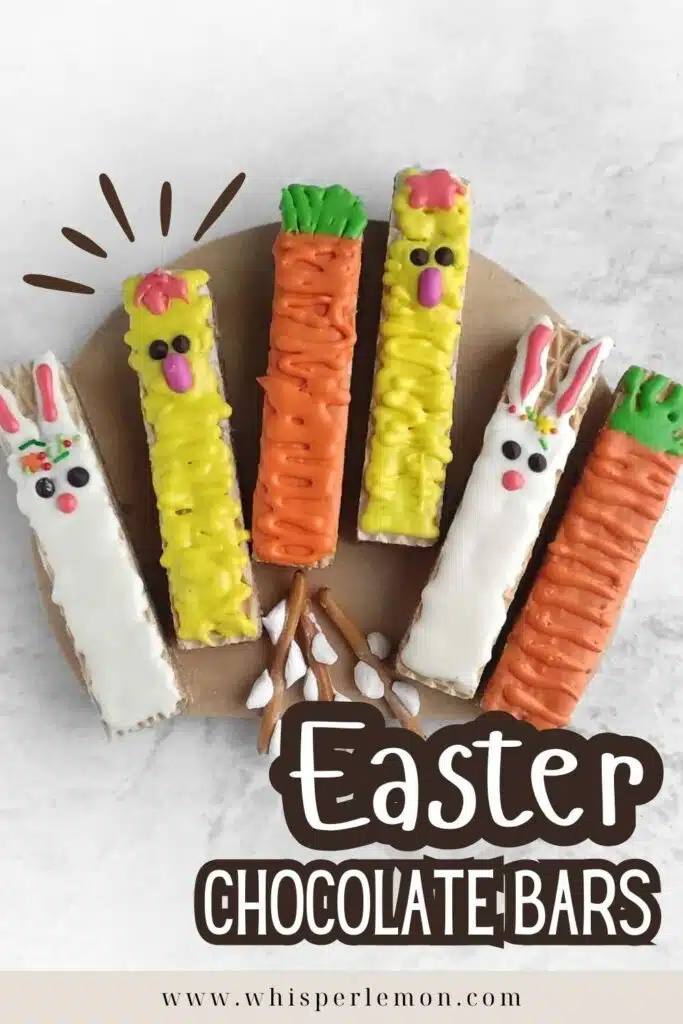
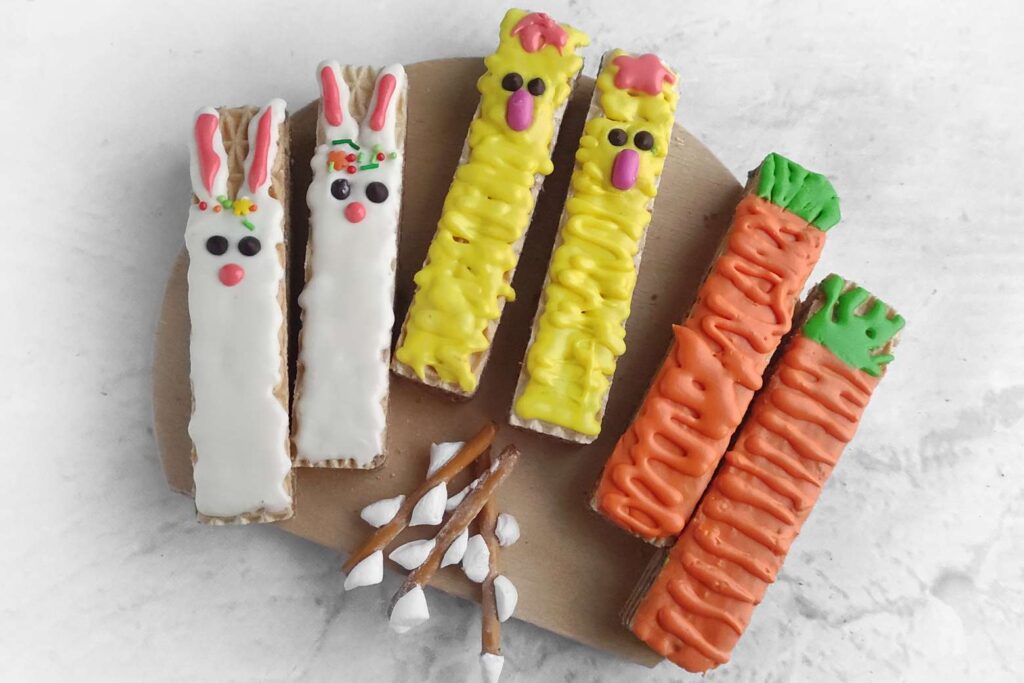
I’ve always loved making fun, festive treats for Easter, and these Easter chocolate bars are my new favorite way to celebrate! These adorable little creations are not only delicious but also so easy to make, making them the perfect Easter snacks for kids (and adults, too!). Whether you’re looking for quick and fun Easter snacks or cute Easter party food, these chocolate bars are sure to steal the show.
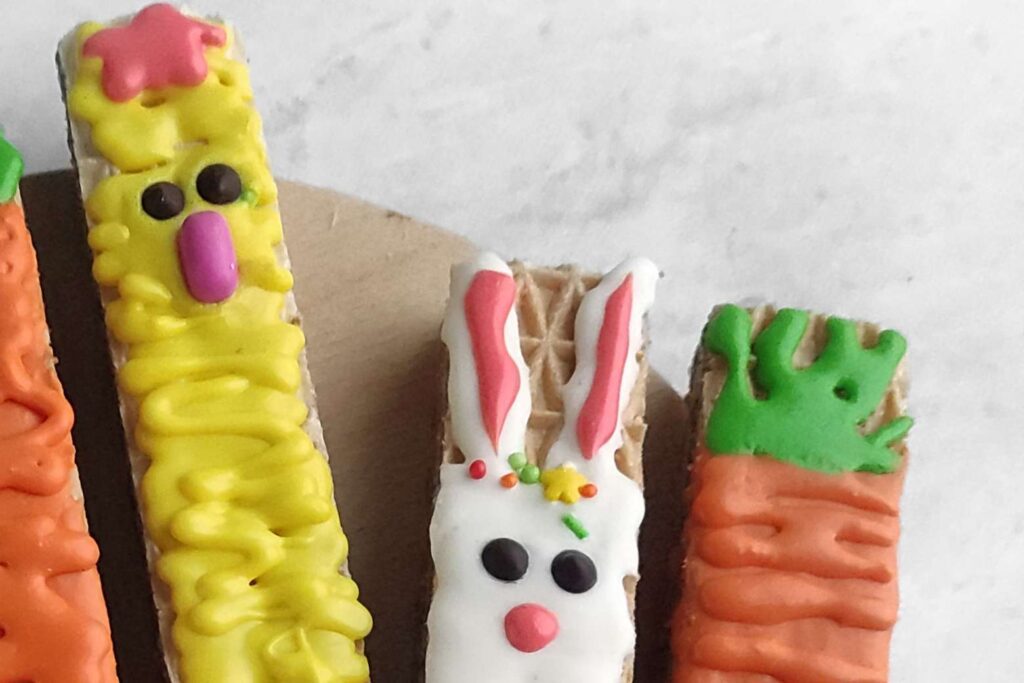
The best part? They’re customizable! With just a few simple ingredients, you can turn wafer cookies into bunnies, chicks, and carrots; making them the ultimate Easter sweets that everyone will love. Plus, they’re an easy Easter snack to whip up when you’re short on time but still want to wow your guests. So, grab your piping bag, get creative, and let’s dive into making these adorable, festive treats for your Easter celebrations!
Reasons why you’ll love this recipe♡
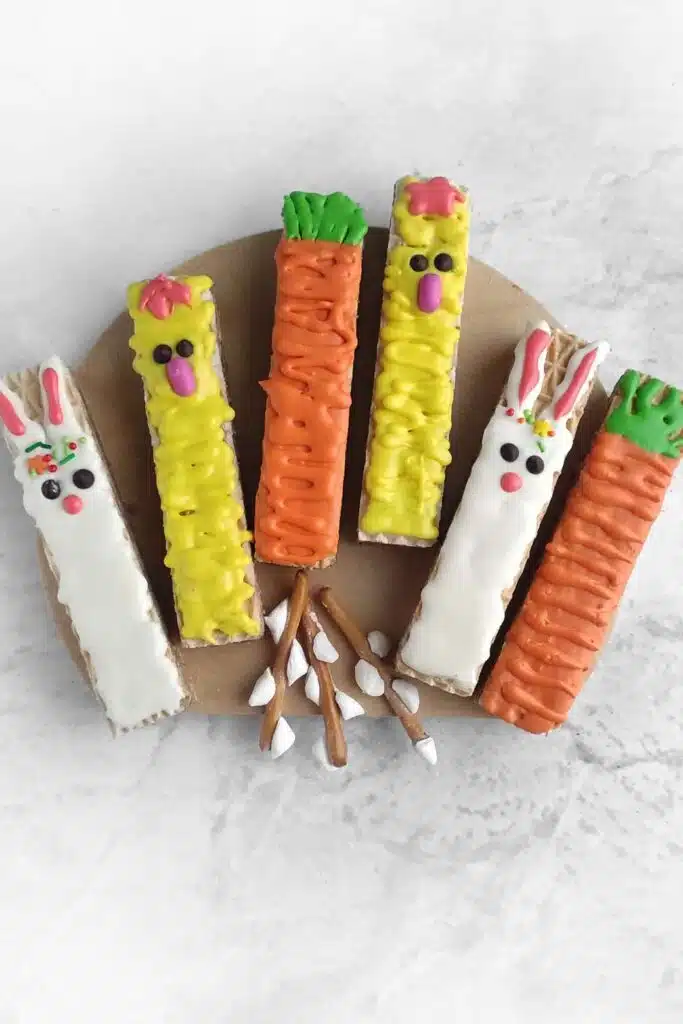
- Fun and Festive – These Easter chocolate bars are perfect for getting into the holiday spirit! Whether it’s bunnies, chicks, or carrots, they add a playful touch to any Easter celebration.
- Kid-Friendly – This recipe is a great way to get kids involved in the kitchen. They can help with the decorating and enjoy these cute, delicious Easter snacks for kids.
- Customizable and Easy – You can mix and match colors and shapes to create your own unique treats. Plus, the recipe is simple, making it an ideal choice for easy Easter snacks.
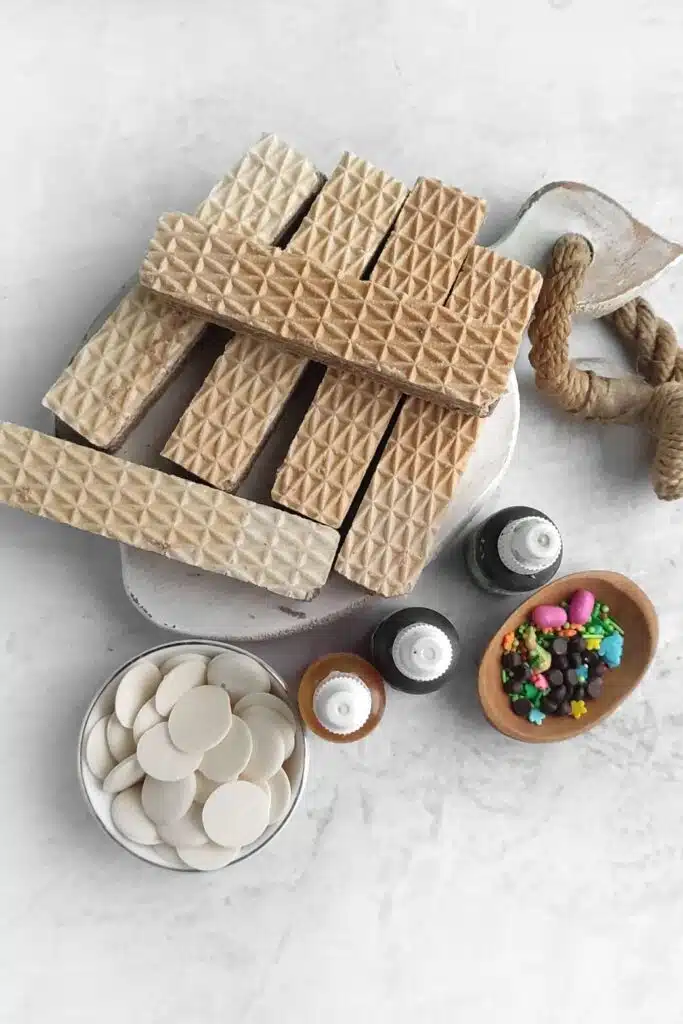
Ingredients you’ll need for this recipe
Servings: 6
Equipment
pastry syringe or piping bag with a small hole
Step by Step Guide
The chick
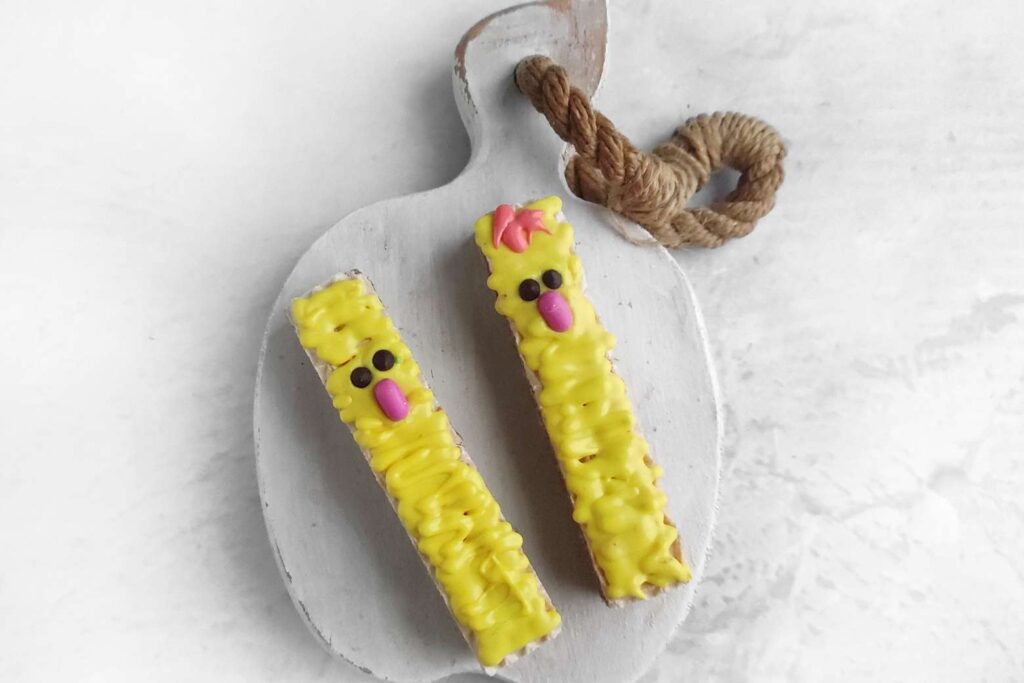
1. Melt the white chocolate in the microwave or using a water bath. Tint it yellow and use a pastry syringe to apply crosswise stripes on a wafer cookie.
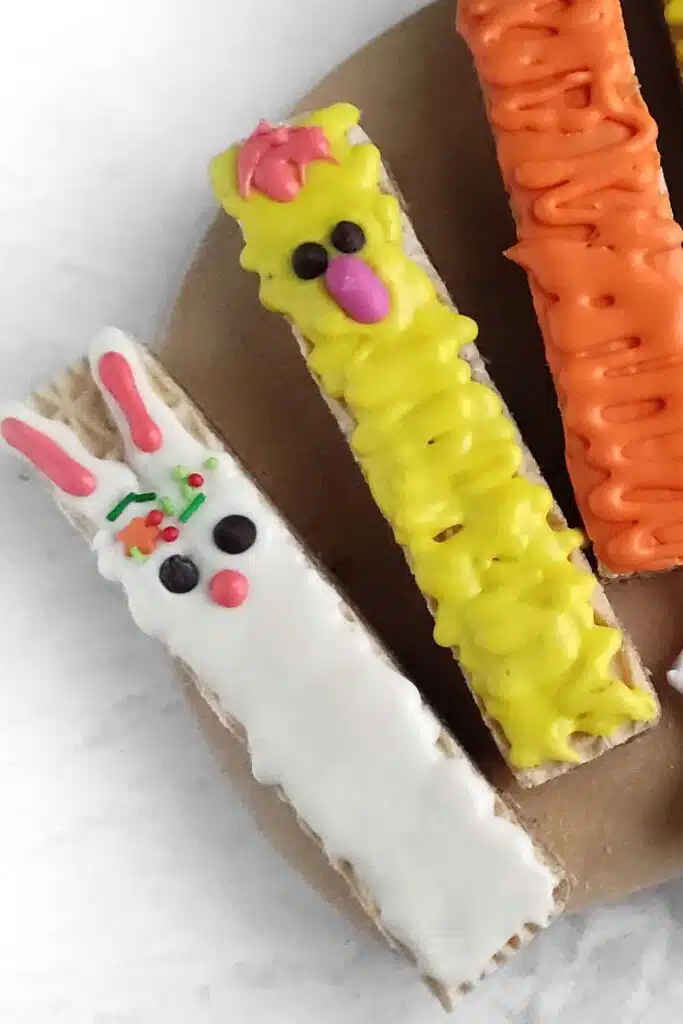
2. Place chocolate chips for the eyes and a candy piece for the beak. Let it cool, then add pink chocolate scallops for extra detail.
The bunnies
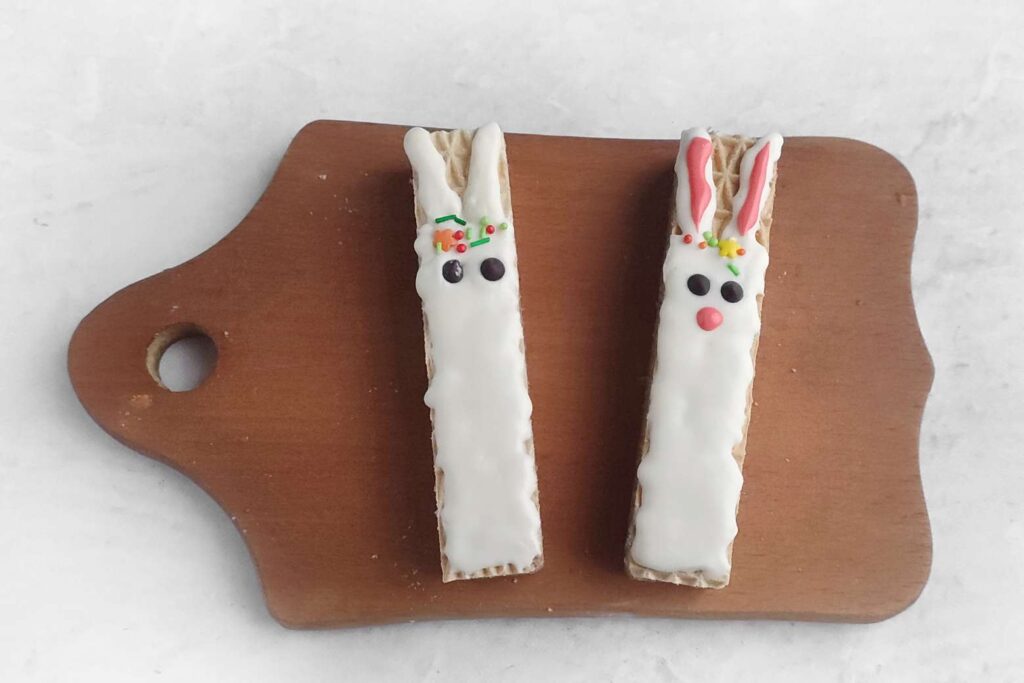
3. Melt the white chocolate until it reaches a condensed milk-like consistency. If it’s too thick, stir in a teaspoon of boiling water. Spread the white chocolate over two-thirds of each wafer cookie.
4. Extend the chocolate to form ears using a pastry syringe or a piping bag with a small hole. Sprinkle with decorations and add chocolate chips for eyes.
5. Chill in the refrigerator for 15 minutes, then use pink chocolate to add details on the nose and neck.
The carrots
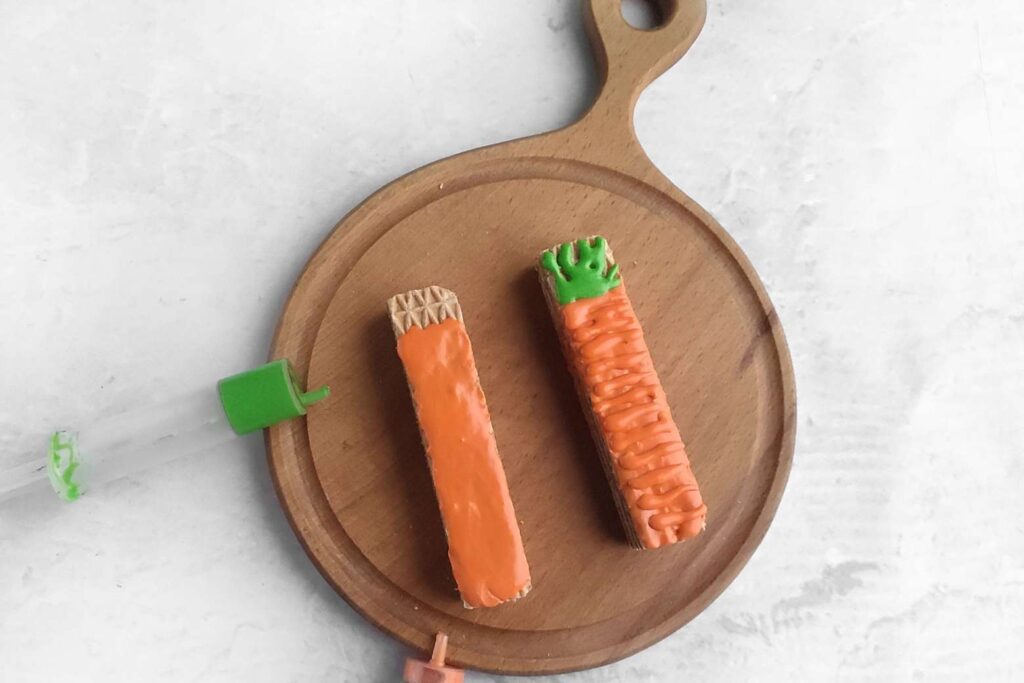
6. Tint the remaining melted chocolate orange and spread it over the wafer cookies, leaving a small portion uncolored. Chill for 10 minutes.
WANT TO SAVE THIS FOR LATER?
7. Use a syringe to apply crosswise orange stripes. Dye the chocolate green and pipe the leafy tops. Allow the chocolate to set before serving.
Recipe FAQ
Q: Can I use regular chocolate instead of white chocolate?
A: Yes, you can substitute regular chocolate for white chocolate, but the colors won’t be as vibrant for the decorations. White chocolate helps achieve the bright, pastel look often desired for Easter treats.
Q: Can I use different types of food coloring?
A: Absolutely! You can use gel or liquid food coloring. Just be mindful that gel colors are more concentrated, so you’ll need a smaller amount.
Q: How long do the chocolate bars need to chill?
A: The chocolate bars need to chill for about 15 minutes in the refrigerator to set properly, but you can leave them a bit longer if you prefer them to harden more firmly.
Q: Can I make these chocolate bars ahead of time?
A: Yes! You can make them a day or two in advance. Just store them in an airtight container in the fridge to keep them fresh.
Q: Do I have to use wafer cookies?
A: Wafer cookies work great because of their light texture, but you can substitute with graham crackers or shortbread cookies if you prefer.
Q: How do I get the chocolate to melt properly?
A: You can melt the chocolate in the microwave in 20-second intervals, stirring in between, or use a double boiler method over simmering water to ensure it melts smoothly.
Q: Can I add other decorations?
A: Absolutely! You can get creative with sprinkles, mini marshmallows, or even edible glitter for extra sparkle.
Q: How do I get the chocolate stripes to look neat?
A: Using a pastry syringe or a piping bag with a small hole will help you achieve neat, uniform stripes. Take your time and apply the chocolate slowly for the best effect.
Q: How do I store the Easter chocolate bars?
A: Store the chocolate bars in an airtight container at room temperature for up to 3 days, or keep them in the fridge if you want them to last longer.
Q: Can I use a different sweetener in this recipe?
A: Yes! If you prefer, you can use a sugar-free chocolate or swap the sweeteners, like using maple syrup or honey instead of candy.
Q: What can I serve these chocolate bars with?
A: These treats are perfect on their own or paired with other Easter snacks. You can serve them with fruit, cupcakes, or a colorful Easter cake.
Q: Can I make these chocolate bars vegan?
A: Yes! You can use dairy-free chocolate and substitute the white chocolate with a plant-based version. Make sure the wafer cookies are also vegan-friendly.
Want more Easter inspiration?
Check out the following recipes:
- Easy Easter Donuts
- Vanilla Easter Cupcakes
- Avocado Deviled Eggs
- Danish Pastries with Cream Cheese and Cherries
- The Best Classic Lemon Bars
- White Chocolate Raspberry Mousse
Easter Chocolate bars
Equipment
- pastry syringe or piping bag with a small hole
Ingredients
- 6 wafer cookies
- 2/3 cup white chocolate
- white, yellow, green and red food coloring
- 8 chocolate chips
- 2 oval candies
- 1 tsp pring sprinkles or chocolate shards
Instructions
The chick
- Melt the white chocolate in the microwave or using a water bath. Tint it yellow and use a pastry syringe to apply crosswise stripes on a wafer cookie.
- Place chocolate chips for the eyes and a candy piece for the beak. Let it cool, then add pink chocolate scallops for extra detail.
The bunnies
- Melt the white chocolate until it reaches a condensed milk-like consistency. If it's too thick, stir in a teaspoon of boiling water. Spread the white chocolate over two-thirds of each wafer cookie.
- Extend the chocolate to form ears using a pastry syringe or a piping bag with a small hole. Sprinkle with decorations and add chocolate chips for eyes.
- Chill in the refrigerator for 15 minutes, then use pink chocolate to add details on the nose and neck.
The carrots
- Tint the remaining melted chocolate orange and spread it over the wafer cookies, leaving a small portion uncolored. Chill for 10 minutes.
- Use a syringe to apply crosswise orange stripes. Dye the chocolate green and pipe the leafy tops. Allow the chocolate to set before serving.
WANT TO SAVE THIS FOR LATER?
Check out other easter recipes


